Showing posts with label easy project.. Show all posts

Monday, September 28, 2015

September DIY: How to Make a Small Room Feel Bigger


Oh, decorating is so much fun! Especially in this fall season that brings promise of change and happy "fallish" activities to come! It's this time of year that I start pushing myself to work on all those projects that's I've been neglecting...such as today's DIY! 

Today, we are sharing on how to make a room feel BIGGER by creating a mirror collage out of vintage frames. Wood vintage frames far surpass their lookalikes and hit so many design must haves!

1. The wood detail adds texture to the room
2. The collage brings height and levels to the walls
3. The reflective mirrors create a sense of depth and make the room feel larger.

See? Win win!

Materials needed: 

5+ Vintage Frames
Paint
Brush
Mirror glass
Cardboard
Wood glue

Cost: 
$10 - $30

Estimated Time:  

3 hours


Collect your Frames - 

I amassed multiple antique frames ranging in age from pre-1920's-1960's from estate sales (usually for $0.50-$1 each). I recommend starting your hunt for frames at estate and garage sales before going to thrift stores (these stores have their merits, but are often overprice and picked over by the time you get to them). The kind of frames you want to look for are the ones with the hideous homemade cross stitch, or the painting of a deer in primary colors. In other words, the one's that other people pass up because they can't see past the ugly. Look for real wood and carved detail (texture!).


Mirrors - 

I got two mirrors at Target for $5.99 each. You can also check Menards or Home Depot if you desire a more high quality mirror. I found out later that higher quality mirrors splinter less when cutting than the cheap ones.


Note: Make sure you measure your frames before purchasing mirrors to make sure it is going to be wide enough to fit the frame.


Paint your Frames - 


The paint brand and color you choose is all personal preference.  We use Country Chic Paint here at Ramshackled Treasures. There is a plethora of colors to choose from and it's quality is second to none!


Frames after 2 coats of paint


Cut the Mirrors to Size - 

Many hardware stores will cut mirrors for you. I took mine to Hardware Hanks and they charged $1 per cut. They ask you to sign a waiver saying you won't hold them responsible if they break your mirror. In the end, they didn't break my mirrors and only charged me $6! Score!


Antiquing the Glass - 

If you really want to get fancy, another option is to age the glass and give it that tarnished, speckled look.
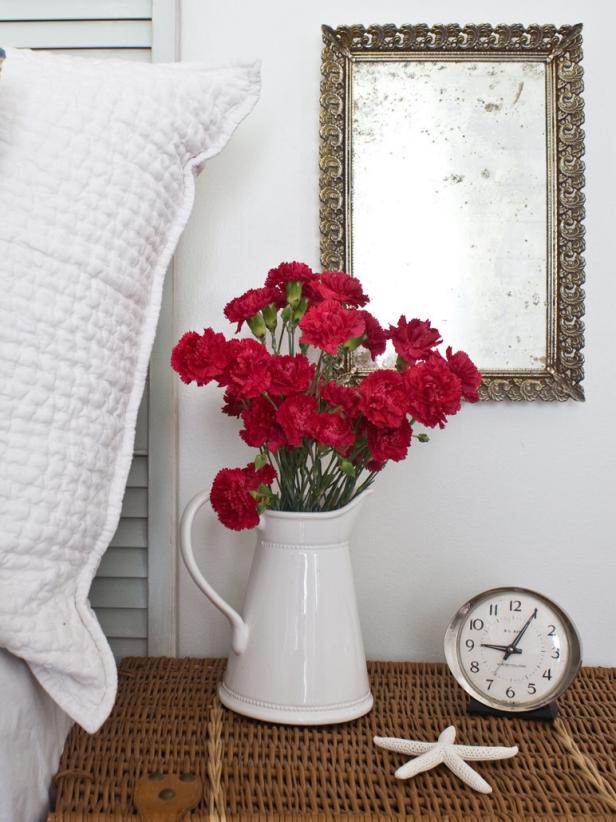


Click here for a step-by-step tutorial from HGTV!

Secure the Back - 

While I was at Hardware Hanks, I asked if I could dig through their recycle bin for cardboard scraps and they were more than happy to oblige. I used the cardboard to cut a backing to secure the mirror in the frame. I used wood glue and a staple gun--I wanted it to be extra secure!


Wall Arrangement - 

It's up to you! I gleaned ideas from these layouts.


Large Mirror Center Stage - 

I picked up a very large mirror at an estate sale for $1. It wasn't till I got home I realized its is a vintage toilet mirror (50's era I'm guessing?). Since it was already a mirror I just painted the frame and it was done! 

Close ups so you can see the paint on the textured frames.


Ta Daaaaa! 
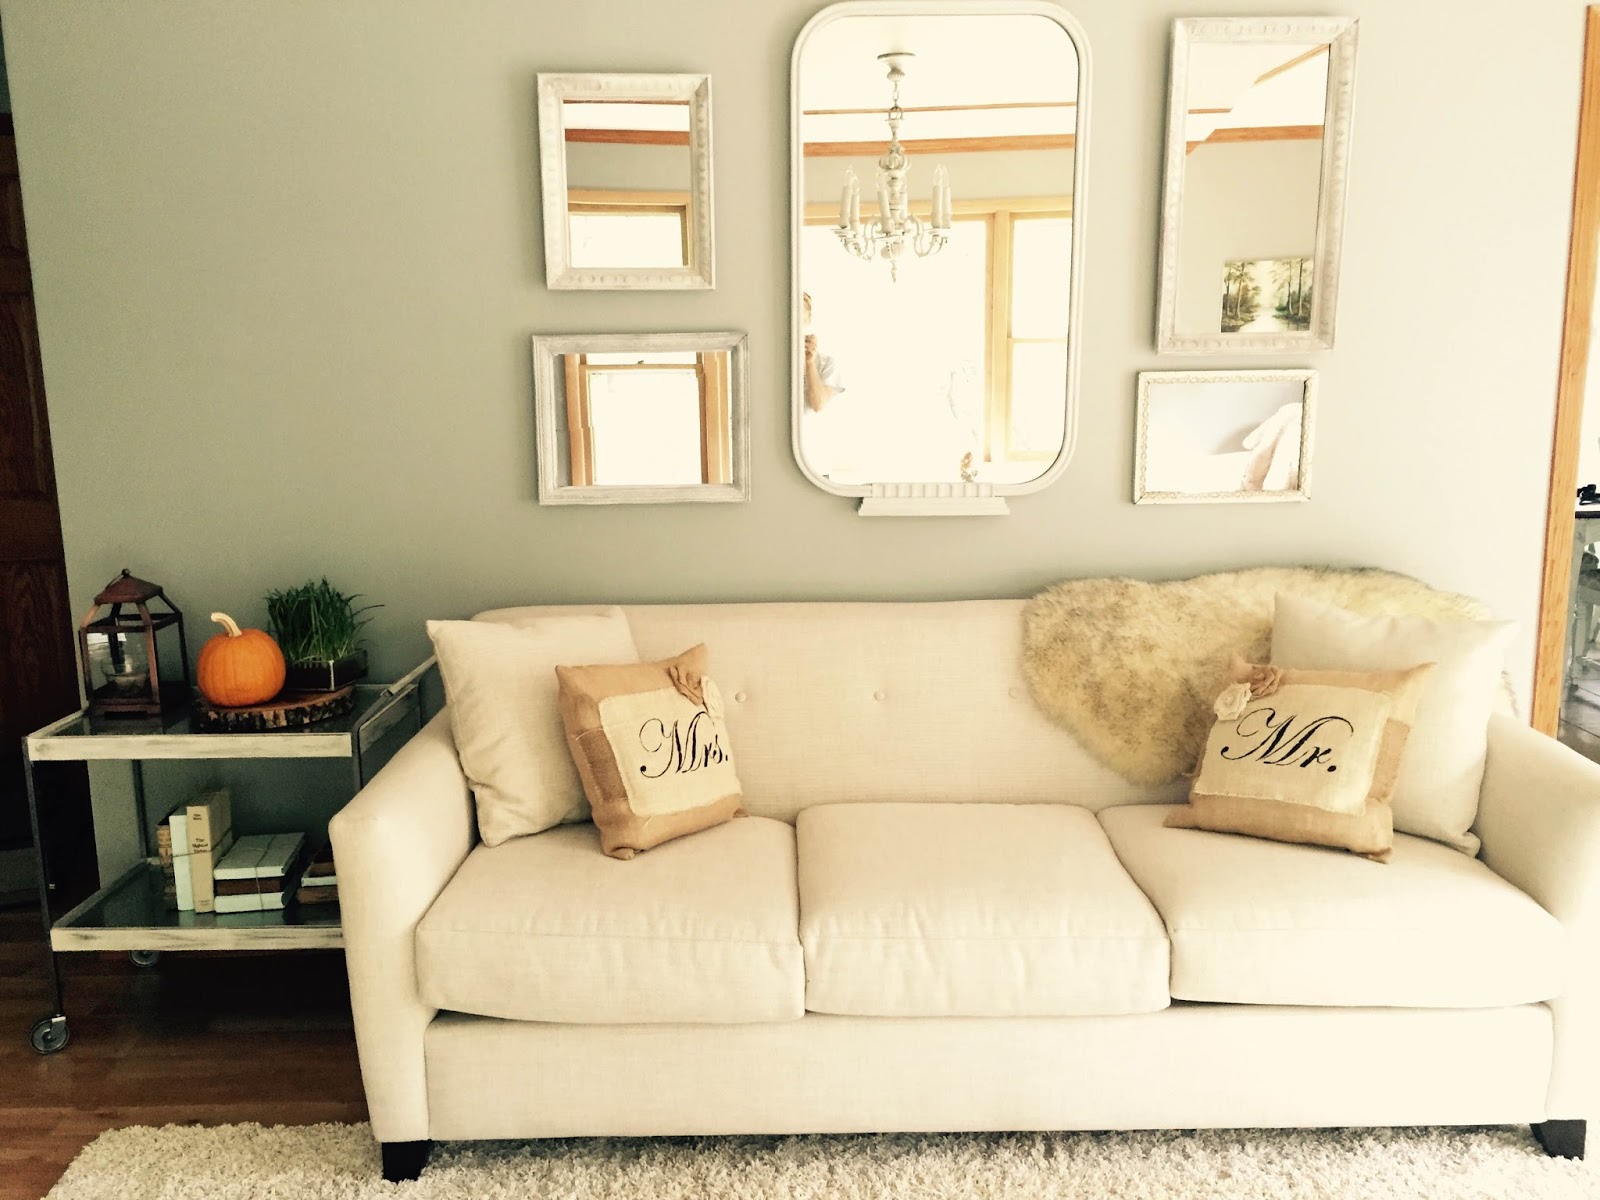


What do you think of our mirror DIY project? Have you ever tackled anything similar in your home? 

Ask us your questions or share your thoughts we'd love to hear from you!!! 


Monday, September 7, 2015

Ramshackled Treasures 10th Anniversary Room Redo Giveaway!!!

Happy Birthday to us! This year, Ramshackled Treasures celebrated it's 10th Anniversary! To thank our wonderful customers we gave away a Room Redo to one lucky winner!

Our winner was Samantha Paulinski, a young mother and wife from St. Michael, MN. After the Redo was complete, Samantha interviewed with us about her experience.

How long have you lived in your current town home? 

Samantha: We moved into this little town home May of 2013! Then shortly after in November we had our son, Rylan. This place is far too tiny and I feel like we are in a shoe box but this is the house we brought Rylan home to, so it just sort of feels like home!


BEFORE: 


When you won the Room Reno, how did you feel? What was the first thought that crossed your mind? 

Samantha: I actually brought my mother-in-law to the shop when they were entering names for the drawing, and she entered my name while I was there. I had no idea what the drawing was even for!

Before Stacey came in and "worked her magic,” what did you dislike/wish you could change about your bedroom?

Samantha: As the toy quantities climbed to an all time high, we traded rooms with our son, since there isn't a play area in the house. So we had his old nursery which had this terrible green wall. It just wasn't a cozy space to wind down. Our room just never felt important to redo because there was always something else that could be done. So it was nice to have a grown up space to go to at the end of the day!

Were you nervous handing the reins over to someone else to decorate your home?  


Samantha: Stacey talked to me a lot about my style, she was very patient while we looked for furniture pieces.  I want to thank everyone at the RT family for the great room redo! I love everything about the room. Thanks!


AFTER: 


Repainted white headboard & new bedding! 

New end tables and pallet art


Wall art, newly painted table and metal art

Lovely new dresser 


And there you have it! Congrats Samantha! Glad you love your refreshed room! 


Monday, August 24, 2015

DIY of the Month: Country Chic Paint


At Ramshackled Treasures, we believe in sharing the things we've learned in our home furnishing and repurposing journey. Every month we will be featuring a new DIY project to help you add an extra tool to your belt and share the exciting adventure of home decorating together! 

Today, we will be talking about a few products in the Country Chic paint line. You can apply these principles to any chalk-based paint, really, but Country Chic is our favorite and is the paint we most readily use in the store. 


We are obsessed with this product for so many reasons:

Health: Country Chic Paint is VOC free which means it has no fumes and isn't harmful to you or your family. This makes Country Chic one of the safest paints on the market today! Round of applause for health! 

Odorless: I tested this one out myself with the ol' schnozz. Only a faint smell rather like cupcake frosting...or perhaps I was just hungry. 

Easy to use & Dries Quickly: I'll speak more on this later.


The Rehab:

Years ago, my dad bought this antique vanity for my mom as an anniversary gift. They didn't have room for it anymore and have since given it to me. Clearly, it's in need of a little TLC and so I am trusting it into the hands of Country Chic! 

Step 1 - Prep your piece:

I prepped the vanity by cleaning it with a damp cloth and then wiping liquid sander deglosser on the areas I planned to paint. 

Step 2 - Choose your colors:

I chose Country Chic's 'Lazy Linen' color for this project. I love it because, like linen, it looks clean. But it is also a beautiful, country white, not a blah-first-apartment-white, if you get my meaning. 

I also chose Country Chic's black 'Graphite' glaze for the distressing step. 


The first thing I will say for County Chic paint is--wow it goes a long way! I only had a 4oz sample jar and I painted the base of my vanity and the base of this coffee table with two coats each! 

P.s. no snide remarks about my cruddy brush, I've forgotten to clean it one too many times. :)

It also worked really well over the piece. It was smooth and didn't dry too quickly where it becomes unworkable in the first 30 seconds. When dry, the finish feels rather like an egg, dry, low sheen and slightly textured. 

As I was squatting under the vanity, I bumped the top of my head against a leg. 

Surprise! Free 'Lazy Linen' balayage! 

Just kidding. I washed my hair over the sink and it came right out. Another brownie point for Country Chic! 

Step 3 - Glaze distressing: 

Glaze is a sand-free distressing method and by far the easiest distressing method I've tried. 

Have a clean, dry rag handy and a cup of water. I dampened my brush many times prior to dipping it in the glaze because I didn't want the glaze to apply too heavily. Find all the cracks and crevices in the piece and brush it in. I was going for a 'lightly distressed' look. The nice thing about the glaze is it is really easy to work with and you can add and wipe away according to your preference.


Let it sit for a minute...

                                                                       and then just wipe away the excess! 


Side note: I opted to strip the top of the vanity instead of painting it. I used a Minwax Dark Walnut stain on the top, and two coats of Minwax poly to finish it. It still has really old scratches deep in the veneer that didn't come off with the striper and although it might drive some people bonkers--I love that about it! 

Final step - Wax: 

Finally, with a clean cloth, I rubbed finishing wax on the painted areas of the coffee table to give it a protective finish. I let the wax sit on the pieces for about 10 minutes and then wiped away the excess with a fresh cloth. 

And voila! Isn't she cute?! And such an easy project.


Oh, and my mom called and wants her vanity back. This could get ugly.


The Country Chic paints, glazes and more are available at Ramshackled Treasures in Zimmerman, MN. If you have any questions about using County Chic paint feel free to call us at (763) 856-8700 any of our vendors would be happy to speak to you! 


Have you ever tried chalk-based paint? What do you think of the glaze distressing method? 

Let us know in the comments below.