We love wandering into a fabric store and feeling all the different textures and allowing our eyes to feast on the colors and patterns. There is something so rich about textile and it adds a custom look to ones home.
Usually, a pair of accent chairs purchased new from a box store runs about $300-$600. Today, we are reupholstering a pair of accent chairs for just $46!
Supplies you will need:
Staple Gun
Staples
Tape Measure
Flathead Screwdriver
5 boxes of Upholstery Tacks ($1.99 each)
Small Hammer
Pliers
Scissors
Screwdriver
4 yards of fabric - ($26)
Two Ugly Chairs - ($5 each)
Note: Depending on the condition of your chairs, you may need to buy new cushions. These will usually add another $15 in cost per chair.
Time: 5 hours
The patients prepping for surgery. See how they are nervously holding hands?
But speaking of surgery, don't these chairs look like they belong in a dentist office? We chose them because they are VERY solid, believe us, they were some of the hardest chairs we've ever had to de-construct. And we liked the real oak detail and clean lines. We thought they'd be just the right style for the mid century modern home they were going in--and hey, for $10, we practically stole them. And dentist office or not, we knew when we were finished with them they were going to be fabulous!
Deconstructing your Chair
As you look at your chairs, think of places where you will need to tuck and staple the fabric. You don't want your fabric staple points to be seen so you'll need to create openings to hid the fabric ends and staples. This opening is usually at the back of the chair. We pulled the fabric off the back of the chair, rolled up the foam and found the tiny crack between the back of the chair and the seat.
The Seat
We usually upholster the chair seat first. Measure the seat and then make sure you add several inches to each side so you have enough room to pull and and staple the fabric under the seat.
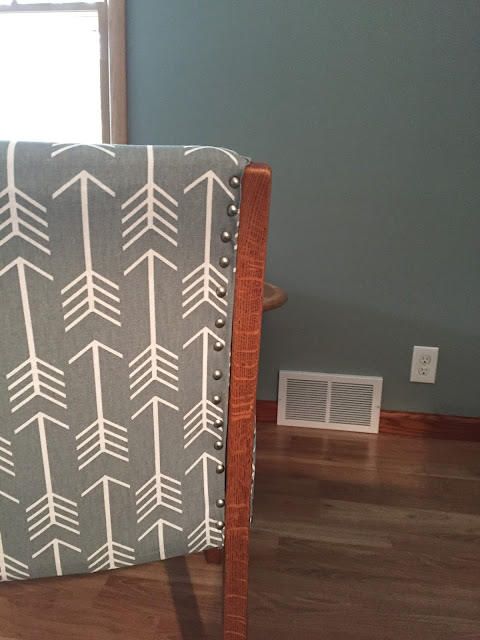
If your fabric has a specific direction, like the arrow motif fabric that we chose, make sure you consider which direction you want it to lay before stapling it into the chair.
NOTE: Fold fabric over at least once before stapling, this will keep it from ripping away from the staples over time.
Arms
The arms came off of these chairs which made it easy. But with a chair like a wingback, they won't be removable. In this case, you'll need to wrap the chair arm in fabric and look for the best places to staple where it won't be seen.
Backrest
This is when it all starts coming together! Drape your cut fabric over your chair. Tuck the bottom in the same crack as your seat fabric, fold and staple. In the back you have a few options...
Two seams with decorative upholstery tacks...
This is achieved by cutting the first piece that and stapling it the the top, then using a second back piece to cover the staples and secure it with decorative tacks.
Cording...
Cording can be handmade (if you're a sewer) or you can often find pretty, ready made, cording at craft stores. And all you have to do is hot glue that puppy in there to hide the staples and seams.
We chose to do one continuous piece of fabric for my chairs and tack them with silver upholstery tacks. And that's all there is to it! It's quite simple once you see the process, right?
Bippity boppity boo!
We hope you find this DIY helpful, and if you decide to tackle a reupholstery project let us know how it goes!
We also sell one of a kind, re-upholstered items at our store, Ramshackled Treasures, in Zimmerman MN! So stop by one day and browse around.
*STAY TUNED THIS WEEK FOR A BONUS BLOG WITH DETAILS ABOUT ANOTHER LADIES ON THE LOOSE EVENT NOV 7TH! (Hint hint CHristmas is in the air!)
Thanks for reading please feel free to like and comment below. Follow us on Instagram @ramshackledtreasures and Like us on Facebook!


No comments:
Post a Comment